Saturday, December 31, 2016

As a scientist I only tell people what is really necessary to achieve ones means not how to go broke doing it.

Nothing new about LED’s, they came out in 1961, only the way they are now implemented into the Aquarium trade and hobby. This reminds me of Mercedes-Bens at one time was at the foremost in innovation and technology in the automotive industry and now cars like Mitsubishi give you better technology at ten thousand dollars less.

As the word gets out about these Bright Stik’s more and more hobbyist are going to realize that Kessil as good as they are, are like the analogy I used above and cannot justify their price to what can be achieved at 1/4 the price.  The light bulbs are great and the price of only $15.95 USD @ 100-watts 6500k a pair, makes them a fantastic deal. Just look at Jacobs’ Aquarium on YouTube and look how many of these Kessil Tuna Suns he has over his plant pond. He could have done the same thing for less in cost. Starting a business is hard and every cost savings ideal is money in the bank.

This also tells us hobbyist that LED’s can be had for less than what they are being sold for and manufactures now have to start adding bells & whistles to their products to justify cost. The bells & whistles are not a necessity but they are just fun add-ons’ only.


Saturday, December 17, 2016

For those of you that like YouTube videos more than reading, I did a short video on the Bright Stik’s that I have been researching.

For those of you that like YouTube videos more than reading, I did a short video on the Bright Stik’s that I have been researching.  Don’t expect this video to be a Stanley Kubrick masterpiece but it does get the point across on how the lights work and work well they do.

In today’s hobby aquarium lighting has become so very subjective in as they have more options built into them than just providing a light source for photosynthesizing of aquatic plants or exaggerating the coloration of our animals. If you’re into the bells and whistles then there is a plethora of already in-the-box aquarium lights out there, however, they do come with a hefty price tag. But if you’re looking for a DIY project that will save you a ton of money then what I have found may just be what the doctor ordered.

Click on the link below for more information and video.

Cheers,

Kevin


Anoxicfiltrationsystem.blogspot.com


Sunday, December 4, 2016

Though this is not pond related, many pond hobbyists bring their Goldfish indoors for the winter months. This also means that some plants may be added to the aquarium that the fish are in and lighting is a big plus in order to keep the plants alive.


A poor man’s Kessil overhead planted aquarium light system.

Kessil a division of DiCon the parent company, aquarium can lights have been around for some time now and it is unmistakable that they have further the popularity of the aquatic planted aquarium interest. They have now through obsolescent, single handedly crush the Metal Halide lights of days of yore that we hobbyists use. With their cool operation, high light output to electrical power consumption with LED cluster magnification system and adjustable light output they have achieved a highwater mark for what other lighting systems now must achieve. They are very compact into a small can size light fixture and allow easy access (because they sit above the tanks water surface by several inches) for tank maintenance without the burden of removing light strips that sit on top of the aquarium.  That was one thing I always disliked about strip lights, once removed, now you can’t see in the aquarium to do water changes.

The reviewers rave about Kessil lights to the point that the reviewer must now try and justify the very expensive cost to the number of LED’s in the unit to dollar amount. This cost however does make this lighting system a little difficult for most hobbyist to afford. The cheapest I have found the two Kessil light models for is $239.oo for the Tuna Sun A160WE and $399.oo USD for the bigger A360WE respectably. Add on a Kessil A series gooseneck mount and that adds another $39.oo USD to the price for each lamp can. If you’re like me and live in a state that makes sure you pay your fair amount of state taxes on internet purchases add 10% more on all orders out of state from internet purchases and you are looking at a whopping $305.80 for the Tuna Sun, the cheaper of the two can lamps.

The one caveat about the Kessil is; it’s hard to justify such a cost of a Tuna Sun for a 20-gal aquarium or better yet, a four-foot aquarium will need two of these lights and now $611.60 USD is out-the-door just to light up a 55-gal aquarium… are you kidding me? No matter how you do the math or try and justify the cost to the number of LED lights, this definitely does not give the impression to be a great deal. But, apparently to some hobbyist this price point, though expensive, is still better than the strip lights that are presently out there. Plus, the Kessil lights gives that shimmer affect at the bottom of the tank that so many hobbyists love to see, just like the Metal Halides do.

Okay, what does all this have to do with the poor man’s Kessil lighting system in my introduction. After some research and experimenting with different lighting systems I found an LED light bulb that has 24 HO LED’s in a small perimeter of 1 ¼” ID that you can add to any light fixture. The lights bulbs are from GE and are called Bright Stik BC Globe in Day Light @ (6500 k) 100w, 1500 lumens of light output as is. You can buy a pair of these light bulbs for $15.95 USD at most retail outlets stores. The only modification that needs to be done to the light bulb, is the removal of the diffuser end cap. It’s because of this end cap the Bright stik is only rated at 1500 lumens. This can either be pulled off or cut off at about ¼” from the base of the light. I just cut the end of the diffuser cap because it was easer that forcibly trying to pry it off. Once the cap is off then the 25-LED’s will be expose and will be in four clusters of six LED’s set evenly inside the circumference of the light bulb.

 Just like the Kessil lights that are also very bright because of the cluster of LED’s in such a small circumference; one cannot look directly into one of these Bright Stik lights without some eye impairment, so caution must be taken. The smaller Tuna Sun has 24 LED’s and the larger A360WE has 45 LED’s per light can. So, if you wish to add more light to your aquarium when using a Bright Stik, in other words more LED’s (two will equal 48 LED’s), then add two Bright Stik’s instead of just one to even out the light over the tank; this is what I use on my 27” long aquarium. Each Bright Stik has its own light pendent from Zoo Med (mini size) hanging about 6”-8” from water’s surface. Example: A 24x24x24” 60-gal cubed aquarium would need two Bright Stik’s in a Zoo Med combo deep dome lamp fixture mini.


The Bright Stik’s create virtually no added heat to the tank even though they look like they would.


 At Big Apple Pet Supplies in Florida, you can buy a Zoo Med combo for $24.99 USD and I have even fond such for as little as 20.95 per combo on Amazon Plus.  The pendent light arms mounts can be bought for as little as $16.95 USD, this is the kind that will stick onto the back of your tank. So instead of paying $305 dollars for a Tuna Sun with Gooseneck mounting arm you can get 200-watts of LED HO lighting for as little as $54.oo USD, that is a cost savings of $251.oo USD. You will still end up with that beautiful tank shimmer that makes the Kessil lights so desirable, too. At the cost for one Tuna Sun and mount you can buy 5 of these combo lighting systems as stated above and have over 1000-watts of lighting system over your aquarium. Imagine placing three of these light combos on top of a 70-gal aquarium, that would give you 8.5-watts per gallon of water @ 600-watts, more than enough light to grow any plant available to the hobbyist all for $162.oo USD.  My 400-watt Metal Halide not only would cost more to run in electricity cost than the LED Bright Stik’s(16-watt) but would also create a considerable amount of heat in the tank and outside of the tank, too. Virtually no heat is expended from the bottom of the Zoo Med pendants when the Bright Stik lights have been on for over 10-hours.

I will end this by saying that if the Kessil pendent can lights are your preference then by all means buy what you like and disregard what you have read here. However, if you are like other hobbyist and your wherewithal are in short supply or you can spend your money on better things than on aquarium lights, them by all means check into these Bright Stik’s. I will also make a note here: As an Ichthyologist, I have seen more fish than the average hobbyists will see in their lifetime and these lights bring out the natural colors of fish and plants that closely mimics that of a natural environment at high noon in any aquatic habitat that I have seen. Their color temperature is spot on without the over exaggeration of colors or pigmentation that so many lights give our inhabitance.


Anoxicfiltrationsystem.blogspot.com


Friday, September 30, 2016

Thought you'd like to see how I discretely incorporated your anoxic filter system into my 4500 gal pond three years ago.

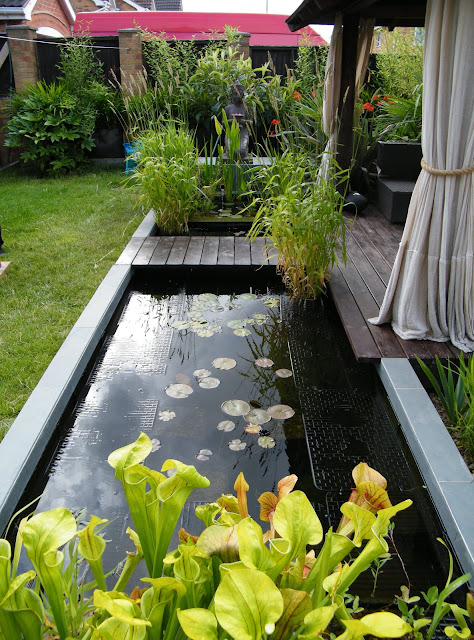
Thought you'd like to see how I discretely incorporated your anoxic filter system into my 4500 gal pond three years ago. Most pumped water flows to my main waterfall over two tiered flagstones but about a quarter of the flow is directed toward this upper basin in which I have eight of your baskets. That water flows over the baskets two feet below the surface and then down a small spillway into the lower basin, main pond. My anoxic filter just looks like an upper basin with lots of water lilies, which do a lot better than those in my lower pond.


Sunday, July 31, 2016

Just thought that I would update you on the progress of the pond and send you some pictures.

Hi Kevin,

Just thought that I would update you on the progress of the pond and send you some pictures. All fish are extremely healthy and well and all survived the winter. Last year I said that I had been a bit disappointed with plant growth and you said that the plants would have to relearn how to absorb nutrients again from the water as opposed to compost. Well they have and the pictures are testament to that. We have had an explosion of plant growth.

Not sure if you remember that I was unable to get Laterite last year so used the JBL AquaBasis plus. I don't think it was up to the job, as the plants were looking very sickly spindly and yellow when they started growing in spring this year. I added a couple of treatments of Velda Ferro plus and the plants burst into health. I have not added any other supplements this year.

I did get some blanket weed in the anoxic pond and the main pond at the start of the year but when the iron kicked the plant growth off, this has gone. Next year I will add some iron earlier.

I did not do a winter or spring clean out as the pond was new last year and it didn't need it. I just cut off all vegetation and left the pump recirculating through the main pond, but this winter I am going to leave it running through the anoxic pond but just bypassing the black box pre-filter.

I currently have about 30 x 5 inch fish and all seems well with nitrite and nitrate at 0. This year has also seen "wildlife" in the pond. We had a visit from a very large frog, a dragonfly, and we have pond skaters, snails, and things resembling wood lice, centipedes and a minute see through prawn. We must have also had a spawning at some point because we spotted one tiny 10mm fish.

So all in all we are thrilled.


Rachel, Nottingham U.K

Monday, July 18, 2016

I converted my 45,000lts (11887.75 US gallons) Koi pond to an Anoxic filter on 6th June 2011 and have had no problems.

David Collins, the one that wrote this little article is from France. He has been writing about the Anoxic Filtration system for many years now on Koi Forums to let everybody know just how good the Anoxic Filtration System really is. How big are his fish you may ask: 25-32"(63- 76 centimeters) long. Not only that but his pond is very overcrowded, too. 

I converted my 45,000lts (11887.75 US gallons) Koi pond to an Anoxic filter on 6th June 2011 and have had no problems. I have only cleaned it twice, the first time after 556 days because there was mulm on top of the baskets and the last time was 4th October 2013 to start with a clean filter when I fitted a rotating drum cleaner.

And so onto today. 

I decided that as some of the Koi were looking a bit full of eggs, I’d encourage them to release them - so popped the brushes in. Woke up the next morning to what can only be described as a hell of a mess. Fortunately after 4 or 5 hours of egg laying there followed 8 hours of egg eating. This pattern continued for 6 days. On the positive side it meant no food for 6 days but left my good water trashed……..

My Ammonia (NH3) was up from 0.32mg/L to 1.64mg/L. Not dangerous at 23°C (73.4°) and 6.8 pH but not to my liking. Nitrite on the other hand was up from 0.17mg/L to 1.03mg/L. So to panic or not? Dr. Roddy Conrad of USA fame says don’t panic so that’s what I did, no salt and no water changes.

What I did do was continue the ‘do not feed’ feeding regime and conduct some daily monitoring with the Hanna HI83203. From the first day the parameters started to fall, the NH3 by 20% per day and the NO2 by 25% per day. Five days later I’m back to feeding 500grms of 44% protein food with NH3 at 0.4 mg/L & NO2 at 0.18mg/L.

Conclusion? The Anoxic filter system is without a doubt the best filter in the world. Everybody should have one.


The photo will give you some idea on just how murky the pond water will become after a spawning. Photo taken from internet archives.


Thursday, June 16, 2016

Garden tour in apple pie country...and the Anoxic Filtration System

Garden tour in
apple pie country
: Five big gardens will highlight Brownsville event on Saturday, June 25

click on link above to see video and more info.
QUOTE from: The Register-Guard

“DIY innovators

"When hands-on landscapers Shelly Ellingson and Rick Krause take on a project at their country home near Brownsville, it’s often pretty unique.
Their bubbling, 4-foot-deep koi pond is a case in point.

Made of split-face concrete blocks, the curved pond meshes right against the wood of a back deck. If the water inside seems unusually clear, it’s due to an anoxic filtration system that incorporates kitty litter, of all things.

Shelly learned of the low-cost filtration technique through an online koi forum. “Laterite in the kitty litter pulls the nitrates and the nitrites out of the water,” she says. “It’s a very inexpensive way to filter it.”

With various other landscape projects underway, including a new fire pit, the couple don’t relax much these days. “But when we do,” Shelly says, “it’s nice to sit there (by the pond). I find something very relaxing about just watching the fish, and watching the lily blooms reach the surface and open up.”
The grounds also include a vegetable garden, and on tour day guests may stroll down to the Calapooia River.”

Home & Garden editor Kelly Fenley can be contacted at hg@registerguard.com. Follow him on Twitter: @KFenleyRG.
<p class="jump">Read more <span><a href="http://registerguard.com/rg/news/categories/?subcats=#(gStory.story.subCategoryId)#">#(##class(csp.rg.assets.methods.category).catName(gStory.story.subCategoryId))#</a></span> articles <a href="http://registerguard.com/rg/news/categories/?subcats=#(gStory.story.subCategoryId)#">here</a>.</p>

More GARDEN TOURS articles »

Sunday, May 15, 2016

Q & A TIME ONCE AGAIN:


Q & A TIME ONCE AGAIN:

THIS QUESTION COME FROM THE NETHERLANDS:


Dear Kevin Novak,

Thanks for all your good work on the anoxic filtration system. I am
really interested in this system and would like to get more technical
understanding for implementing such a great system. In the Netherlands,
where I live, it is hard to find good information about this system. As a
farmer I am looking for a biological ammonia filtration system. And I
wonder if your system could do the job, as nature has intended to.

May it be possible to filter high ammonia concentration (14mg/l) on this
filter, by adding more and more baskets with cat litter? If so I could
re-use my 7000 liter of water. I have read that one basket should filter
the ammonia production of active koi per day (33mg ammonia per hour per
kilo bodyweight production is 800mg ammonia per day for a mature koi).
Although the ammonia concentration in koi ponds is lower than in my
situation, I wonder if the facultative bacteria could increase to eat
14mg/l ammonia for lunch.

And what is the maximum amount of water per hour which can be pumped
over an anoxic filter? It might be a solution to increase the
recirculation rate of the water over the filter.

I am really looking forward to your ideas and advice.

With kind regards,

F. Bikker


A: The Anoxic Filtration System is capable of lowering ammonium/ammonia of concentrations higher than the 14mg/l that you stated. The more Biocenosis Clarification Baskets there are, the better the system works on available foodstuff, if that is, it has the chemical insults to deal with in the first place.

You can use your 7000-liters over and over again as long as the stability of the water stays stable enough with ions to hold pH at a constant.

The amount of water that passes through the Anoxic Filter will depend how big the filter is to begin with. The rule of thumb is: The more water that passes through the filter without disruption of sediment or mulm is the best way to use the filter. That is why the diffusion of the water is so important. In the case of the Anoxic Filter, more is better.


QUESTION FROM SINGAPORE:


Hi Dr Novak

I am Cornelius from Singapore. I have read through your excellent blog on the Anoxic Filtration System, and am in the process of setting up one for myself. I would be very grateful if you could help me clarify a few queries?

Regarding Pond Baskets:
1. Is the pond basket (28cm x 28cm x 19cm deep)  I have purchased over the internet the correct one (See attached picture)?

2. Are there enough open lattices at the bottom of the basket? From the picture, it can be seen that some sections of the bottom does not have open lattices. Would this affect the performance of the filter?

Regarding Laterite / Ironite:
3. Do I need to rinse the laterite or ironite before placing them in the center of the basket? I am using ironite and placed half cup of it into a nylon sock before rinsing it. But after rinsing, the amount of ironite that remained in the sock weighed less than half cup.

4. Is the positioning of the laterite / ironite critical? Must it be deeply rooted in the center of the basket? Would it be ok if the laterite is closer to the surface but still covered totally by cat litter?

Regarding Pebbles:
5. For my old filter, I am using Seachem Pond Matrix (Porous Stones) for biological filtration. As I have a lot of them, can I reuse these stones in place of pebbles to cover the baskets? Would they be detrimental to the anoxic system?

Regarding Cat Litter:
6. I am using Sanitcat Pink (Danish Moler Clay) cat litter. It does not clump and retains its structure when wet. But I noticed this cat litter had a fragrant scent upon opening up the packaging. The scent was reduced after rinsing the litter a few times. Would this cat litter be ok for use?

Thank you so much for inventing this awesome system.

Best Regards

Cornelius Tan


This plant basket will do well for an Anoxic Filter.


Q: 1 Regarding Pond Baskets:

1. Is the pond basket (28cm x 28cm x 19cm deep)  I have purchased over the internet the correct one (See attached picture)?

A: The plant basket in your photo will do just fine for the Anoxic Filter.

Q: 2. Are there enough open lattices at the bottom of the basket? From the picture, it can be seen that some sections of the bottom does not have open lattices. Would this affect the performance of the filter?

A: Yes there are more than enough lattice opening at the sides and bottom of your plant baskets.
Q:3) Regarding Laterite / Ironite:

  Q: 3) Do I need to rinse the Laterite or Ironite before placing them in the center of the basket? I am using Ironite and placed half cup of it into a nylon sock before rinsing it. But after rinsing, the amount of Ironite that remained in the sock weighed less than half cup.

A: NO, never rinse the Laterite or Ironite before use. Just place the Ironite in a nylon sock as you have suggested, this will do just fine. You can also if you wish do the same for the Laterite but it is not necessary to do so. The Laterite can be placed directly into the basket in the center as explained on my blog.
anoxicfiltrationsystem.blogspot.com


4. Is the positioning of the Laterite / Ironite critical? Must it be deeply rooted in the center of the basket? Would it be ok if the Laterite is closer to the surface but still covered totally by cat litter?

A: The placement of the Laterite is really not that critical as long as it is evenly distributed inside the baskets. However, most hobbyists keep it in the center of the baskets. The Ironite on the other hand, must only be placed in the center of each basket.


Q: 4) Regarding Pebbles:

5. For my old filter, I am using SeaChem Pond Matrix (Porous Stones) for biological filtration. As I have a lot of them, can I reuse these stones in place of pebbles to cover the baskets? Would they be detrimental to the anoxic system?
A: Very good question and is the best of the lot. Reusing the SeaChem Pond Matrix is not a good idea. If you read my blog I do go into great detail about such filter medium and the good and bad about their use. Please read my articles on filter mediums and then you may see why their use is not a good idea. Just stick to the pebbles to cover the baskets. The links below will get you on a good start about filtration medium.


Q: 5) Regarding Cat Litter:

6. I am using Sanitcat Pink (Danish Moler Clay) cat litter. It does not clump and retains its structure when wet. But I noticed this cat litter had a fragrant scent upon opening up the packaging. The scent was reduced after rinsing the litter a few times. Would this cat litter be ok for use?

A: This is a very hard question to answer because I don’t know the contents of the fragrant/s use in the cat litter. My only suggestion would be make sure you rinse and clean such cat litter to the nines. Then test one of the baskets with a sacrificial lamb goldfishes to see if it will have any ill effect on their health. Some hobbyists have had very good luck with such cat litter and other have had a pond of death with fragrance cat litter.


Sunday, May 1, 2016

IMG 0661 1


The Pterophyllum scalare; pronounced [Tare'-o-fill'-um: wing; phyllum = a leaf: [sca-lair'-e: scalare = ladderlike] are a long time member of this 25-usg (94.63-L) antique brass fish aquarium. The aquarium uses a plenum system on the bottom, which I have written before in great detail in other post on Google +.

Water gets change every 6-9 months and the filter is an old Eheim 2227 water pulsating W/G filter. I don’t think this filter is sold in the US any more because of a problem it has with the Styrofoam float getting waterlogged and sticking.  I have three floats altogether and when filter cleaning is required (every 4-6 months) I just swop them out and let the unused floats dry out. This was not an inexpensive filter, but like all Eheim’s it was made to last, and last it has for the past 18-years now.

The Scalare’s are fed on dried bloodworm and dry foods only; no live food has ever been given at all. Temp is at 79-80º F all year long. The Java fern (Microsorum pteropus) is about 25-years old now and has been a resident of this tank for that many years, too.

Dr. Kevin Novak Ph.D.
Ichthyologist

iPhone 6s took
this video.

Anoxicfiltrationsystem.blogspot.com


Sunday, April 3, 2016

Here is a bit of information from Manky about the Anoxic Filtration System and its diffuser implementation in the system.

Here is a bit of information from Manky about the Anoxic Filtration System and its diffuser implementation in the system. To read more go to his link in the UK and a plethora of information will be at your fingertips.

QUOTE:
“As said in the article, the diffuser is purely to break up the water flow into the anoxic pond to avoid it disturbing the baskets so the design is left to pretty much to the user but there are some pictures for guidance.

Figure 5 and its accompanying description shows a suggested design. The inset diagram below it and the description alongside it shows how that may be implemented to make a simple shut off arrangement that can be used when flushing the anoxic pond.”


Manky


Sunday, February 21, 2016

Here some Q&A by Manky about the Anoxic filtration system.

Here some Q&A by Manky about the Anoxic filtration system.


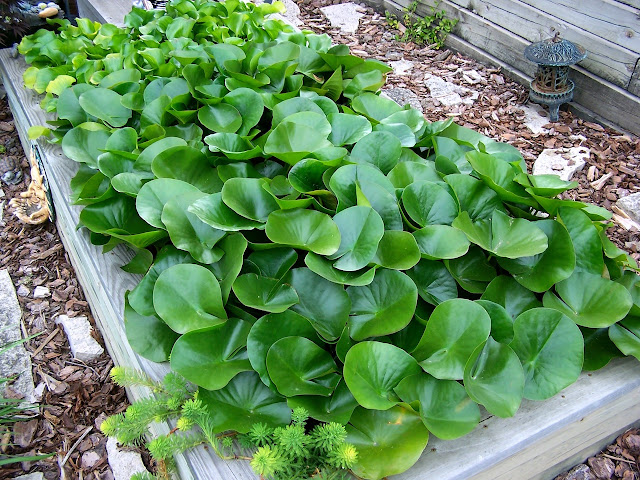
Extreme plant growth is not uncommon in the Anoxic Filter.


Q:

Hi everyone

Now I am probably going to get told off for this idea but fortune favors the brave and all that.

I have had a nightmare digging my new pond I am in proper clay and it all below ground 1.8 m. It has filled with water on me collapsed twice and been the most horrible hole in the world, but now its got a base and concrete block walls and its full of water again.

So here is my mad theory

The concrete block walls are porous and the clay behind holds water all year if I don't pump it out. So would I get the Anoxic filter effect from the thickness of the blocks with the clay behind? The way I see it a natural pond uses the Anoxic effect to stay healthy and this only works because it is clay. We waterproof our ponds thus isolating the water from the soils and clays that would give the Anoxic filtration. We don't want natural ponds as they collapse and form shallow dish shapes great for herons.

So do I leave it bare block and free to do its own thing ? What could possibly go wrong...........................

Andy


A:
Anoxic filtration was designed over more than 25 years by Dr. Kevin Novak Ph.D. and it relies on the interaction of charged sites within the baskets, the charges on molecules and the kinds of bacteria that can live in an oxygen depleted environment. It's easy to do if you do it properly but doomed to total failure if you don't. Read how anoxic filtration actually works and how to build something that really works then decide whether or not you want to go down the anoxic route and the benefits it brings.


Manky